How to Cut an External Thread in 2 Steps?
In order to screw a counterpart into an internal thread, the counterpart needs an external thread. In this article, we will show you how to cut an external thread on an aluminum rod in two steps. Like the female threaded tool, the male threaded tool follows the DIN standard. Depending on your Internal Threads, you will need the right external threads.

Round Dies
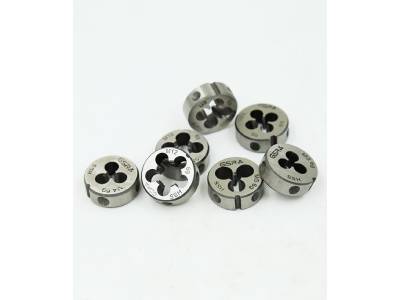
The external threads, also known as threads, are cut by hand using a round die fixed to the die holder. The Round Dies has three or more cutting edges, depending on its size. Between these cutting edges are cavities for chip removal. The cutting edges are serrated and geometrically represent the threads of the nut. A round bar is usually used as the counterpart of the internal threads. The diameter of the round bar must be slightly smaller than the outside diameter of the threads because the die will press the material slightly outward during the cutting process.
Note: If you have a turning lathe, then the turning diameter should be about 0.1 times smaller than the thread OD for the pitch. This means that if you have a pitch of 1.5 mm on the outside diameter of the thread, this will result in a reduction of 0.15 mm. After turning, the diameter of the round rod is 9.85 mm.
To cut the external threads, you will need the following tools:
File
Round bar
Pliers
Round die
Round die material
Flat head screwdriver
Cutting spray to obtain the best surface quality
Work procedure
1. Filing
In the first step, file the edges of the round bar and chamfer the bar, which should be slightly larger than the thread depth. This will make the die easier to start and the cutting edge can grip the round rod better.
2. Cut the external threads
In the second step, clamp the round die to the die holder and cut the threads. When fixing, make sure that the holes for screw connection are in the correct position.
When threading, carefully rotate the round die clockwise onto the round bar with sufficient pressure. Make sure that you cut the threads straight. Use a cutting spray here. Spray the head of the round die with cutting spray. This will increase the life of the round die and improve the surface quality.
After cutting the threads, unscrew the circular die in the opposite direction.
Done. The thread has been made. You can test the result with a suitable nut.
We also have a Thread Repairing Tool and a hole punching tool available, please feel free to contact us if you need them.


